

Do you want to learn How To Organize Contacts Into Lists on iPhone And iPad? With the release of iOS 16, Apple’s mobile OS got a lot of new features that stand out, like widgets for the Lock Screen and the ability to change how it looks. It also got a lot of other changes that aren’t as obvious. The Contacts app lets you make lists of contacts, which is one of these features.
Before iOS 16, Apple users who wanted to make contact lists had to use the iCloud website or a Mac. Now, you can do it right on your iPhone or iPad. It’s a great way to organize your contacts into groups like family, friends, work colleagues, clients, etc. It makes it easier to find contacts, and you can also email everyone on a certain list.
How To Organize Contacts Into Lists on iPhone And iPad?
In iOS 16, the steps below show you how to make lists.

- Open your iPhone’s Contacts app. You can also use the Contacts button in the Phone app to get to your contacts.
- Tap Lists in the Contacts interface’s top-left corner. (On an iPad, it’s the button on the side.)
- Tap Add List in the upper right corner, and if you need to, choose an account. iCloud is the default.
- Call your list something, and then tap it.
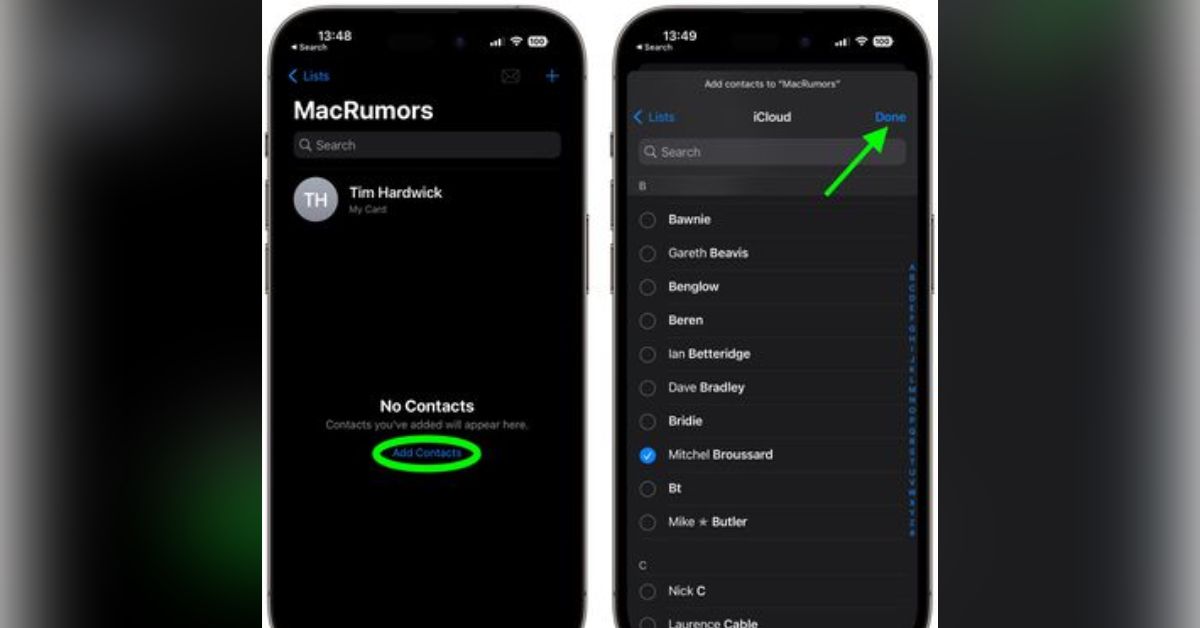
- Tap Add Contacts
- Choose the people you want to add, and then tap Done.
- You can now email or message all of the people on the list. Tap the Mail icon in the top right corner of the list to send them an email. To send a group message to everyone, tap Lists, then press and hold the list you want to message and choose Message All from the menu that appears.
Must Check
- How To Record Video With Background Music on iPhone?
- How To Get Receipt From Maybank2u App? (Complete Guide 2023)
Note that you can edit or delete lists by swiping left across a list on the main Lists screen. This will show you buttons to edit or delete the list.
Add this page Nog Magazine.com to your bookmark for more tech-related updates.